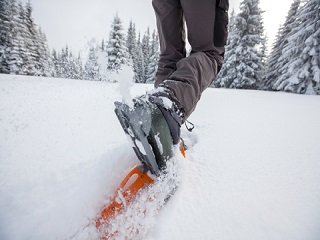
 I know that from an outside perspective, there doesn’t seem to be much more to snowshoeing than simply walking on the snow. Believe it or not, though, there is actually a lot of technique involved, and today we’ll take a look at a bit of it.
Before you set out, it’s useful to learn the proper etiquette for sharing the trail with others. You’ll commonly be sharing the trail with cross-country skiers, especially in the backcountry. If possible, try your best to make your own trail, staying out of the tracks that skiers have worked so hard to set. Cross-country skiers also have the right-of-way on the trail, since it's easier for a snowshoer to step off the trail safely than it is for a skier to stop or go around.
Snowshoeing on flat, or even rolling, ground takes some getting used to, even though you’re pretty much using the same movements you’re used to. Though, your stance will need to be wider than normal, in order to keep from stepping on the insides of the frames. Because of this, your hips and groin muscles will ache after the first trips to the trail.
When you ascend hills, use your toe or instep crampons for traction. Always place your feet firmly on the snow, with your poles in front of you. Depending on the conditions, though, there are a few techniques you can use on hills. In powdery snow, use the kick-step technique, which entails picking up your foot and literally kicking into the snow with the toe of your boot to create a step. This plants the crampons or cleats firmly in the snow, directly under the balls of your feet. However, if conditions are such that the kick-step just ends up making a deep hole, in hardpack snow, for example, then you probably won't be able to kick-step. Instead, use traction devices like claws and poles to walk up the slope if it isn’t too steep. When tackling moderate to steep slopes, flip up the heel lift feature, aka climbing bar, under the heel on many snowshoe models, which puts your leg in a more comfortable position for long ascents.
On descents, try to keep your poles planted in front of you, with your knees bent and relaxed, and your body weight slightly back. Walk smoothly and plant your heel first, then your toe. Here, you naturally want to lean back on the snowshoe tails, and this actually works well on models that feature angled crampons built into the heel and designed to dig in as you descend, but without heel crampons, you'll need to keep your weight distributed across your entire foot, so your toe crampons will need to be planted firmly.
Try to keep from swinging your legs too much as you descend, because it can cause your snowshoe’s tails to flip out in front of you. Furthermore, if the slope becomes steeper, be sure to keep your weight back as best as you can, and if you do slip, just sit down. Lastly, poles can provide improved balance and control as you descend, so if you plan on trekking hilly terrain this winter, it might be smart to pick up a set.
As you can see, there’s a bit more to snowshoeing than most people originally think. Be sure to come back for Part Two of the Technique portion of our Snowshoeing Guide, where explore more of how to properly use your snowshoes to their fullest and safest potential.


